Saturday, April 23, 2011

Happy Easter to me...happy Easter to me...

This almost did not turn out.


In fact, yesterday, as I was putting most of it together I kept thinking in my head, "Amber, there is a reason that most people make things in a plain color.  Because it always works out.  It always looks great.  Why, just once could you not try something in a plain color..."

**A note about the fabric: it is black/white pinstripes of varying widths, so doesn't photograph well.
Seams, etc are straight and pressed, but it's hard to tell:)


 This went on for some time.

Happily though, it all worked out!  To my liking anyway:)

This is Simplicity 2554, View F, with alterations.

I bought this 100% rayon (that really doesn't feel like 100% rayon) at Hancock Fabric a couple weeks ago.  $1 a yard.  Of course I didn't buy an obscene amount of fabric.  A perfectly manageable amount, in case you were wondering.  (By the way, which side does 15 yards of fabric fall on--out of curiosity?)

I cut a size 8, added 2 inches to the length.  (My measurements are a 12-14 mix)  I also added some shirring to the back panel to give some waist definition--looking back I wish I had done a little more.


I also added cap sleeves.

I first just cut 4 of the sleeve facing, thinking that would give me enough coverage if I just flipped it out, but no luck.  So I added this piece:

11" by 3" at the widest portion

it ends up looking like another layer of ruffles!


without jewelry/hair in the way

This skirt is a "gift" from my Mom.  (stolen)  But she's off on a LDS Humanitarian mission aboard the USNS Comfort.  So she doesn't need it anyway.  Thanks, Mom.

Also, I needed some jewelry, so I went to JoAnn and bought


For $5. And added a bracelet my Mom gave me (thanks, Mom).  And made:


Cost analysis:

pattern:  $.99
fabric:  $3  (only used just over one yard, but I include the initial purchase into the first project)
thread:  stash
elastic thread:  stash 

grand total:  $3.99


Happy Easter to you all!

Thanks for your comments on my last post--you guys are awesome!  I'll be topstitching the bust dart on the dress, and I can't wait to show it off!

Friday, April 22, 2011

Sewing during real life looks like:

I actually have been sewing.  When my husband goes out of town I usually do my best work.  (Sorry babe, but it's true).

Anyway, this past week has been kind of a disaster.  Firstly, the second my husband left--this happened:


Somehow the laundry detergent started creeping out of the container, infecting my clean pile of laundry.

(Maybe, just maybe, I shouldn't leave clean laundry in the laundry room)


Megatron busted open my couch, well both of them if we're being honest.  Too bad I hate mending and/or sewing decor.


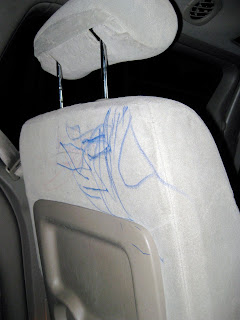
The children expressed themselves with Sharpie in my minivan. 

(Recently, my husband started following my blog (he's the follower with Calvin and the Red Sox) and he hasn't heard about this one--hopefully he won't check tonight)

Babe, if you are seeing this, I'm totally sure that whoever decides to buy our vehicle won't care.  Totally sure.


The "I" was found missing and I had to take down the rest of the letters so my child would "stop seeing the gone one"


And of course, the expired coupons found their way into my purse.  Boo.

For whatever reason--all these things involved crying.  (Not ALWAYS by me--sheesh)

Not to mention the fact that my 5 year old suddenly cannot go to preschool without crying for an hour, trying to get into school for the summer semester, a more time-intensive church responsibility, and the fact that my children think I can't sleep the entire night ALONE in my own bed.  

On the good side--nothing is really "wrong", I have a clean house (why can I only clean when my husband is gone?), and I got a bunch of sewing cut out!  Yea!

But I have a problem...


So, I had to underline this dress (red on red, if you were wondering).  And the darts mostly worked out.  Mostly.


Now, my ironing skills have improved a great deal, so please don't tell me to press it.  It's the fact that there are 2 layers above the dart and 6 below.  The bust darts are the only noticeable problem.  

My question is...
Would it be advisable to stitch a very small line just under the dart to keep the puffyness down?  
(In a perfectly matching thread color)

And if not--then what?


Friday, April 15, 2011

The Easy Rectangle Shirt

What do you do if you have some dated, polyester, fabric with possibly the worst color scheme ever?

Quite obviously, you try that one idea you saw somewhere on the web once, but now can't find anywhere.  (Apologies for my unexcusably bad grammar)

3 rectangles and a slit gives you this:


I started with a 35"x59" rectangle and had left over.


Measuring:

Under bust (mine was 31 1/2) This is where you want the seam placed.

Length you want the shirt to be from underbust (12 inches)

From underbust to same point on back (mine was 27 1/2)

From elbow to elbow across the top (mine was 30)

(You can see my shirt is looser--you can make this more form fitting)

My kids LOVE when I do timed shots
Cutting:

Then we cut out some rectangles.  Cut out 2 rectangles 16" by 12" with the stretch going across the 16" (so it pulls to 20" or whatever).  I tapered the bottoms out by 1 inch on each side (making a trapezoid for all you geometry enthusiasts).  This is your lower torso.

Then, the big rectangle will be a square 27.5" x 30"  (The stretch goes on the 27.5" side, but it doesn't matter really, you could use a woven for this part if you wanted.)

Congratulations your cutting is almost done!


Fold the large rectangle in half, the way you would be wearing it, and in the middle cut a slit crosswise 10-11" long.  This should be large enough for your head to fit through.

Now, your cutting is done.


Assembly:

Mark the middle on both lower rectangles and long sides of large rectangle.  Match them up and sew, stretching smaller rectangles as you sew.


Fold, putting neck slit on top, match sides and sleeves.  Sew in one continuous seam.


Finish hems (if needed) and finish neck slit. (I just reinforced the edges of my slit and folded the edges under slightly).


Voila!  Easiest shirt ever!

You could probably complete this in half an hour, if you are a fast cutter.  Or maybe if you just aren't a slow cutter:)

Thursday, April 14, 2011

70's, Vintage Sewing, and the Evening Tree Namesake

I haven't sewn since my last post almost 2 weeks ago.  Except to redo the neckline on this shirt:

The gathers around the neck are a little uneven, but this is a T-shirt, not designer.  Okay?!? Okay.
Joy asked me if this shirt was the signature evening tree shirt and it wasn't.  But this one is.  This is the shirt that got me sewing my own wardrobe.  It's not super amazing or anything, but it makes me indescribably happy.  And isn't that what sewing should be about?

It used to be a huge men's shirt from Michael's for 2.50 or something.  I cut out the crew neck and left the edges raw.  It's been a few years though, and the neck was so stretched out I never wore it.  Happily, my sewing skills are much better now and I edged the neckline with clear elastic (zig-zag stitch), folded it over and stitched twice, keeping the messy look.  (I also took in the sides and sleeves--the pink stitching on the sleeves is where the original shoulder seam was.)

Before bleach pens were marketed in the grocery store, I took Q-tips and dipped them in bleach to make this design.  Then I free-stitched pink and white over all the leaves and branches. I backed the design with a scrap of flannel so I wouldn't worry about the stretching.

I would tell you the real name of this shirt, but my darling husband has decided to use it for is new Genealogy Research company, and is taking the name from me.  Grrr.  But really, I'm happy for him:)
Thanks to Joy for reminding me of my favorite shirt ever.

And speaking of Joy, and her 70's infatuation, made me take out all my 70's patterns.

I get these at secondhand stores for 25-50 cents.

I'm missing a couple, but that is entirely possible considering I never clean out my fabric closet.  My favorite 2 are these:


Yes, that interesting seaming on 7802 includes a pocket.  How cool is that?!  And the one on the left I just realized is the same pattern as this fantastic maxi of Tanit-Isis'.  Very nice.

And, I found a vintage sewing book copyrighted 1943. (The blue book under the patterns above)

With chapters like "Becoming Necklines",


"Choosing the Right Clothes",

and subtitles "How to Get That Expensive Look",


let alone the chapters named "Points to Remember About Afternoon Dresses and Formals", this book is filled with vintage techniques not used commonly and no-nonsense advice about what to wear if one has a thick neck.

Needless to say, this book is charming and wonderful.

Other vintage news at my house includes this lovely shoebox full of ric-rac:

from my dear Grandma H.
So fun!  Except I'm not 100% sure what to do with it.  I love it.  I just don't know where to take that love.  I've tried incorporating it into projects; but I think now that I'll have to design a project specifically for this lovely notion.  Any ideas?


Sunday, April 3, 2011

Simplicity 4233--Invoking Spring

I had to hurry and finish this skirt after our crazy weather!  It was 71 degrees on Friday and it's been snowing on and off all day today.


After seeing Tanit-Isis and Rebecca with skirts to welcome the season, I thought I'd better help.  Here in Utah, spring needs all the help it can get.


And after seeing Camilla's maxi dress, I knew which fabric I wanted to use.  It's a rayon blend and completely opaque. (A perfect summer skirt)


Enter Simplicity 4233, View D.  It has inverted pleats.  I cut a 16--a size larger than normal for me because I've made this skirt before and depending on exactly how much I weigh, it sits at my waist or on my hips.  This varies week to week:)


I usually add a couple inches to skirts and dresses so I can decide how long I want it later.  As a rule I like knee length skirts, but right now I'm loving the longer length.  
  
I used this skirt as an excuse to try a hand picked zipper.  I used this how-to.


So pretty!  I might even try the beading on my Easter Dress.


Those of you with more experience than me (most everyone, I'm guessing), even though I butted the fabric together when I pinned it and stitched; the zipper gaps a little when I wear it.  
I'm not stressing the fabric, so do I need to overlap the fabric a little or move the stitches farther out?

Friday, April 1, 2011

Not just another wadder...

Not that I have anything to prove or anything, but I can make something without wanting to scream.

Meet my delicious zucchini:


Made without screaming.

Since that is out of the way this is my latest refashion:
It was only 97 cents.


But that isn't even the best part, I had a $10 off $10 coupon, and paid 58 cents for this and a lovely green wrap sweater.

Blah, blah, blah

Here we go.

Can you see the tree?  Maybe if you squint?
My hair usually covers half of it.

I'm working on my terribly bad posture.  I am.
This is supposed to be a shot of the sleeves.


So the shorts are navy, not black.

I cut the sleeves and the mock turtle neck off.  Took in both sides by 1 1/2 inches. I finished the neckline with clear elastic.  I did not finish the sleeves.  I reverse appliqued the stripes onto the sleeves to give it a little texture and kept going when I maybe should have stopped (surprise, surprise).  I also reverse appliqued the tree onto the back which I LOVE, and the wolverine slash mark stripes down the front which I do not.  Oh well, I'm sure I'll wear it a few times then add something else to it.   That's usually how it goes.

In wrapping up Me-Made-March news, I have a couple more pictures.

Day 31M6321

I took everyone's advice and ditched the large belt. (This is my obi belt scrunched up for photo purposes). I also wore some stilettos to girly it up.  I like it better, but still not a lot.  I also checked to make sure the waist hit at the right spot, and it is exactly on my natural waistline.  I did make sure that the belt edged higher, instead of lower.


Day 28 Self Drafted Pencil Skirt


I loved Me-Made-March.  I wore my selfmade clothes everyday with only a couple redos.  I didn't realize I had such a closet to work with!  

A couple things I learned:  

It's really really hard to take a picture of yourself every single day.  Before I knew it it was after dark, or how about the day my kid puked on me?  Not everything needs to be remembered.

I can wear a dress.  All day long.  (All day after the heavy cleaning and working out).  
Actually, I really like wearing dresses all day.  It's a lot easier to wear a loud (printed) dress with no jewelry than a T-shirt, jeans, and coordinating jewelry to try to look put together.  Who knew?!